Working with contracts
Mobile App
Template Contract
Integrations
QR Contract
Electronic certificates of completed work
International EDI
Electronic employment contracts
Documentolog Advances
Opportunities
About us
Resources

This extension is designed for document synchronization, ensuring automatic file transfer between systems. With the extension installed, there is no need to switch between two systems (1C and Documentolog Business) to manually upload and download files. All document operations are available in a single window, and signing is done in just a few clicks.
The extension supports working with documents, including invoices, work completion certificates, and reconciliation acts with counterparties. The functionality is available in the '1C: Accounting for Kazakhstan' configuration, starting from version 3.0, in both cloud and local versions.
Signing a document via the Documentolog Business extension
Sending a document to a counterparty not registered in 1C
Sending a document to a counterparty not registered in Documentolog Business and 1C systems
1. Install the extension. The link to download the file is here.
2. After downloading the extension file, log in to the 1C database and follow the steps below.
It is important that the user has full rights or administrative rights to install the extension.
2.1. Go to the 'Administration' subsystem.
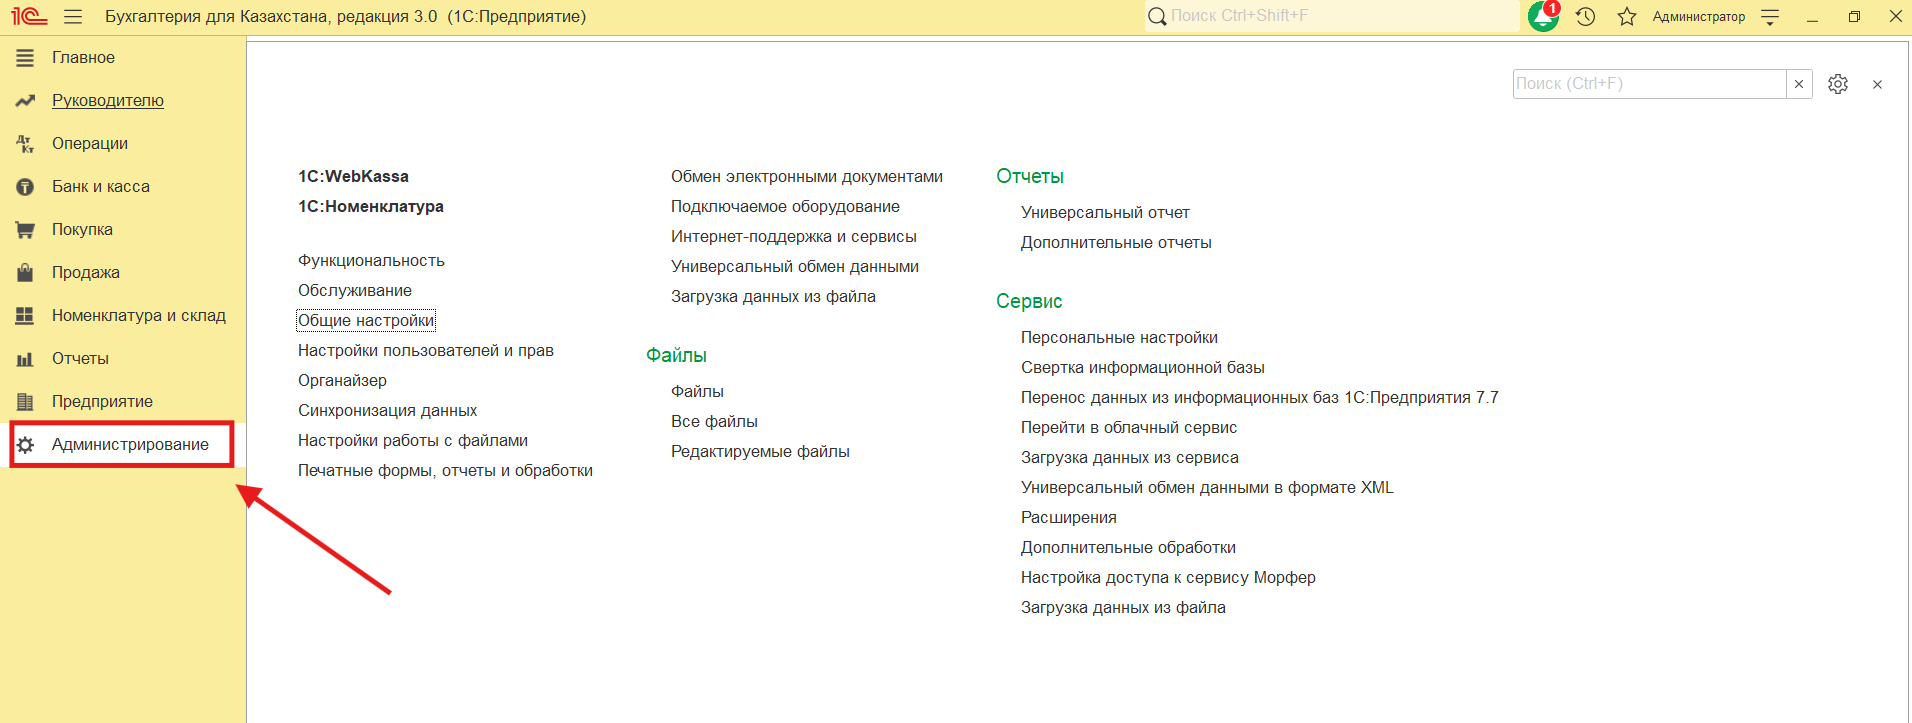
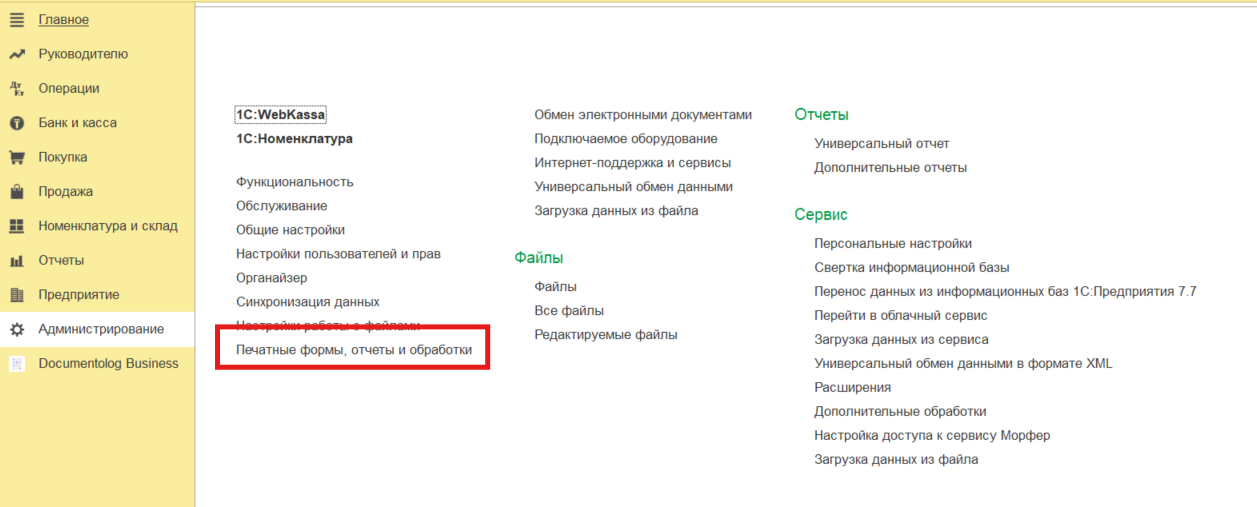
2.2. Click on the 'Print Forms, Reports, and Processing' tab.
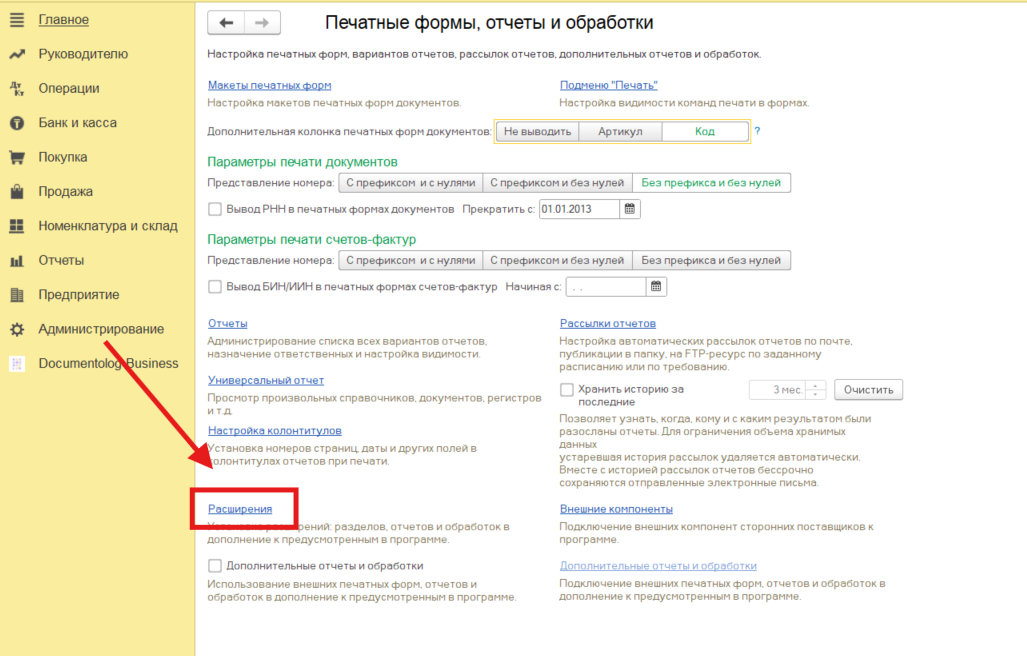
2.3. Click on the 'Extensions' tab.
2.4. The processing for connecting extensions in the 1C database will start. Click the 'Add from File...' button.
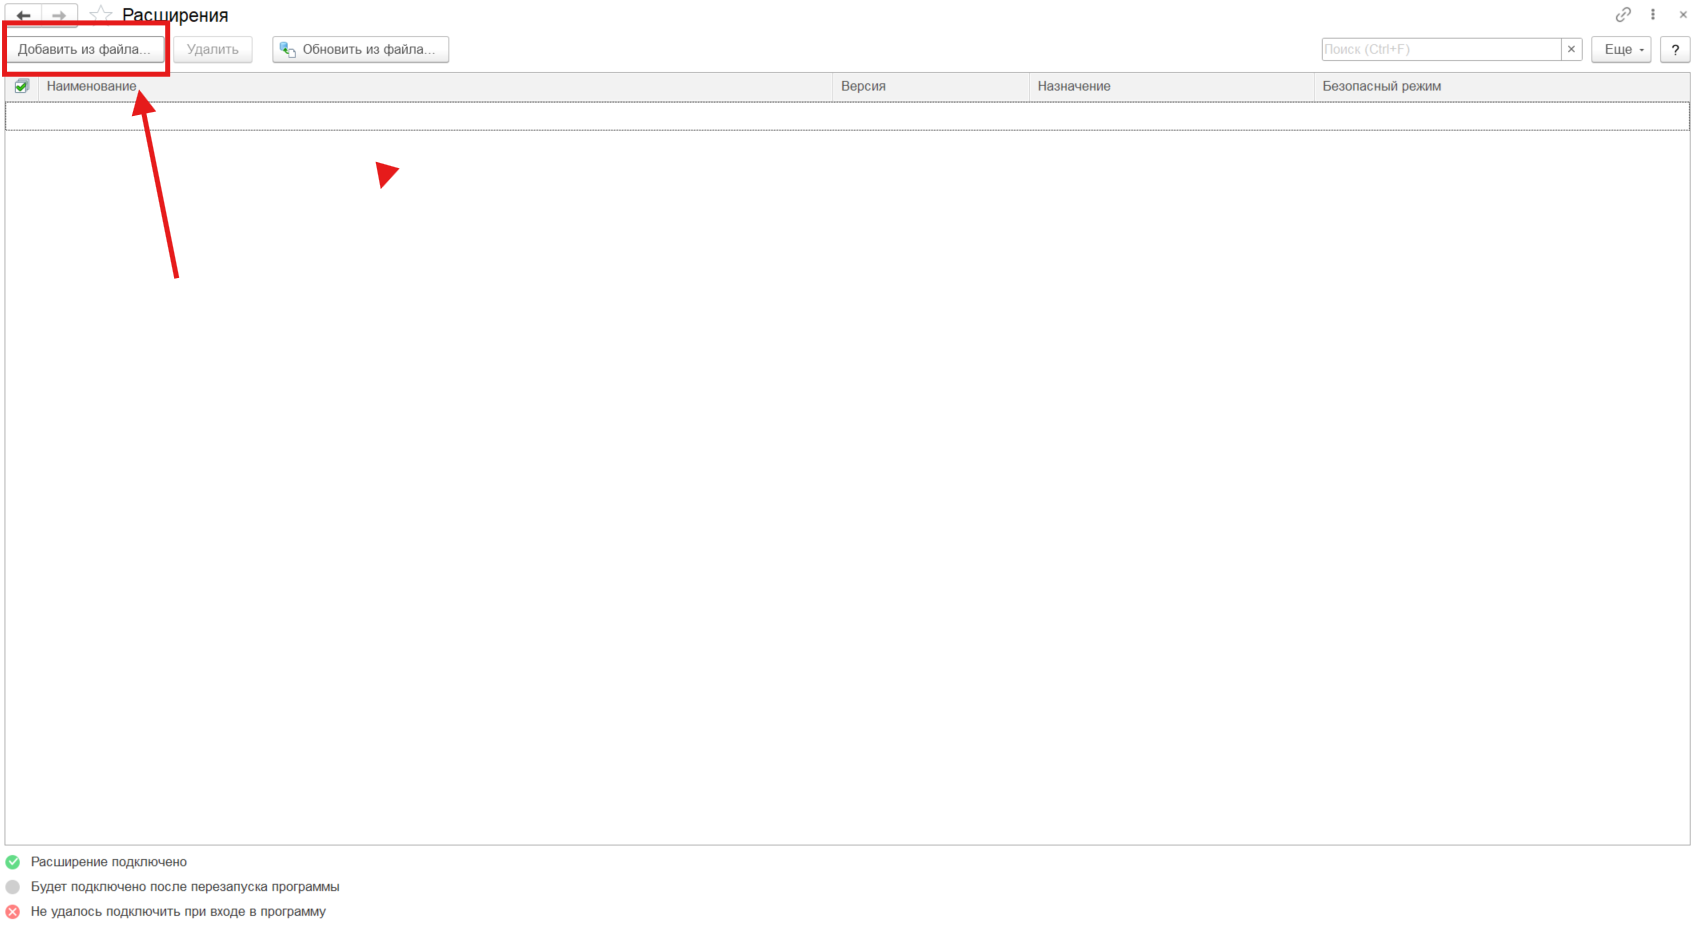
2.5. Select the extension file and double-click it.

2.6. After adding the extension, restart the Enterprise.
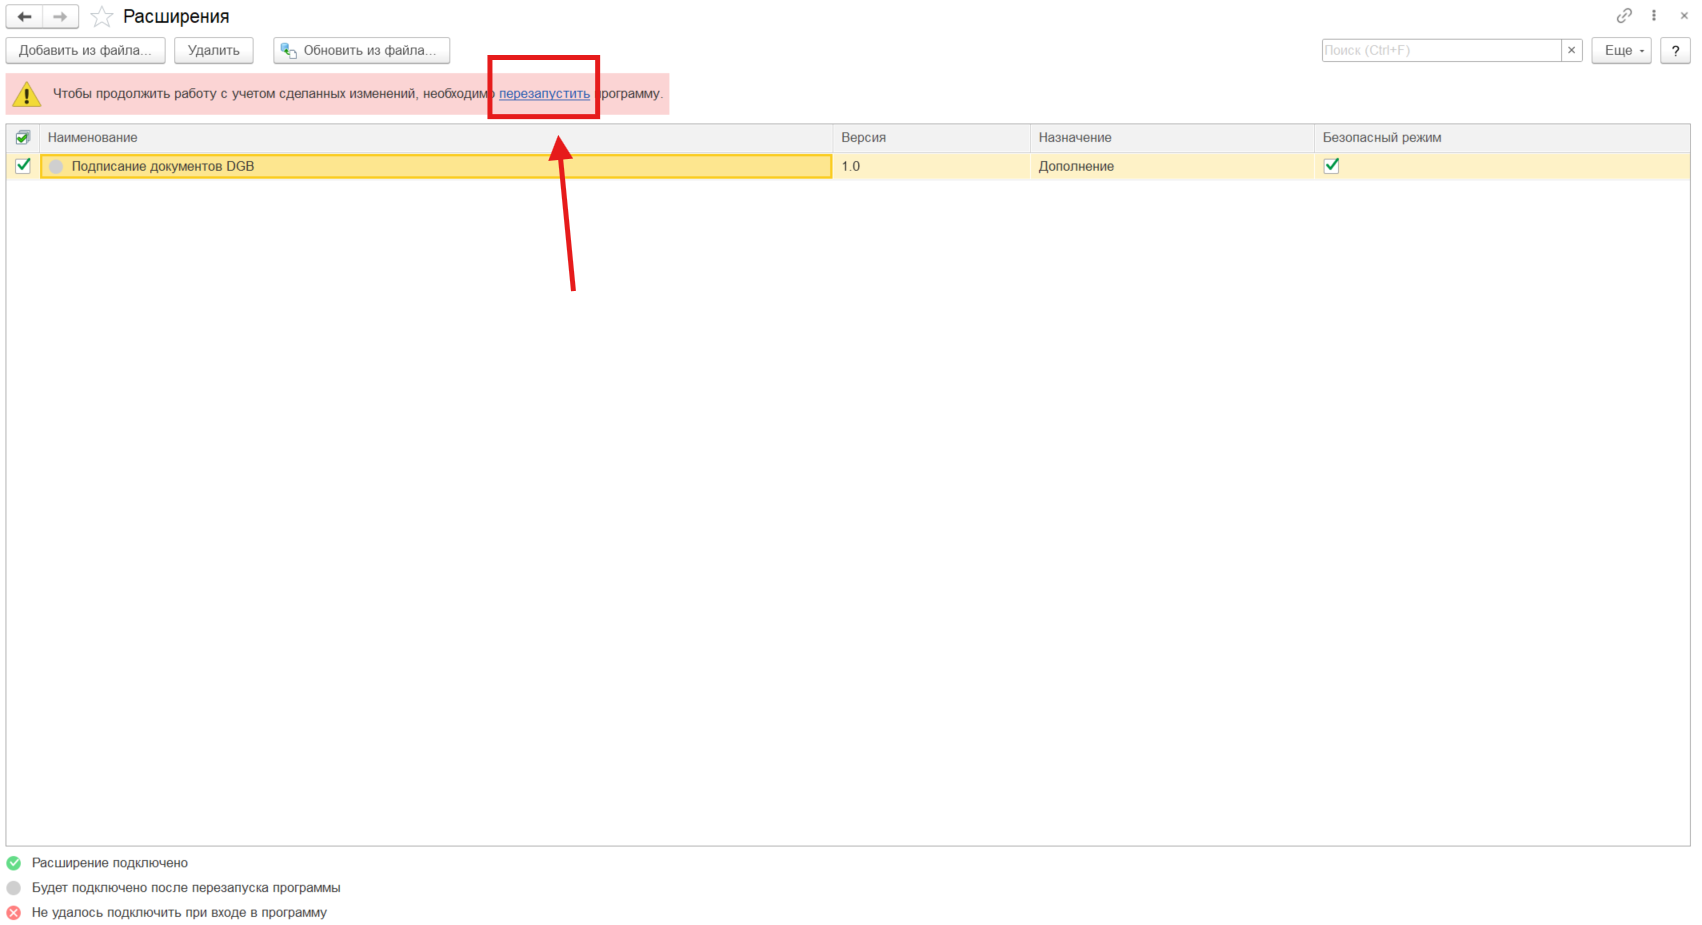
2.7. After restarting the database, a new 'Documentolog Business' subsystem will appear.
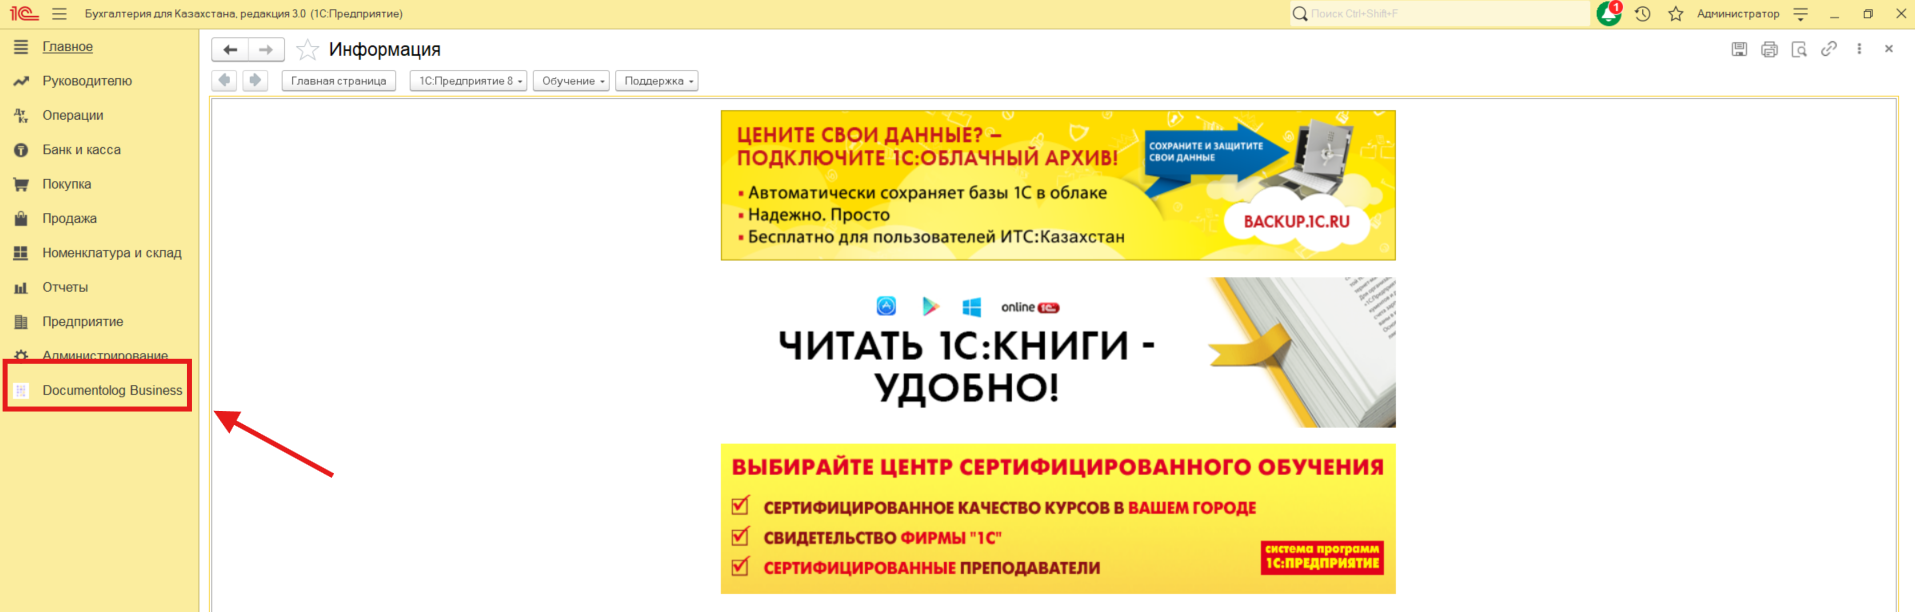
3. The extension has been successfully added to the database. To use this extension, it is recommended to review the documentation 'Using the Documentolog Business Extension'.
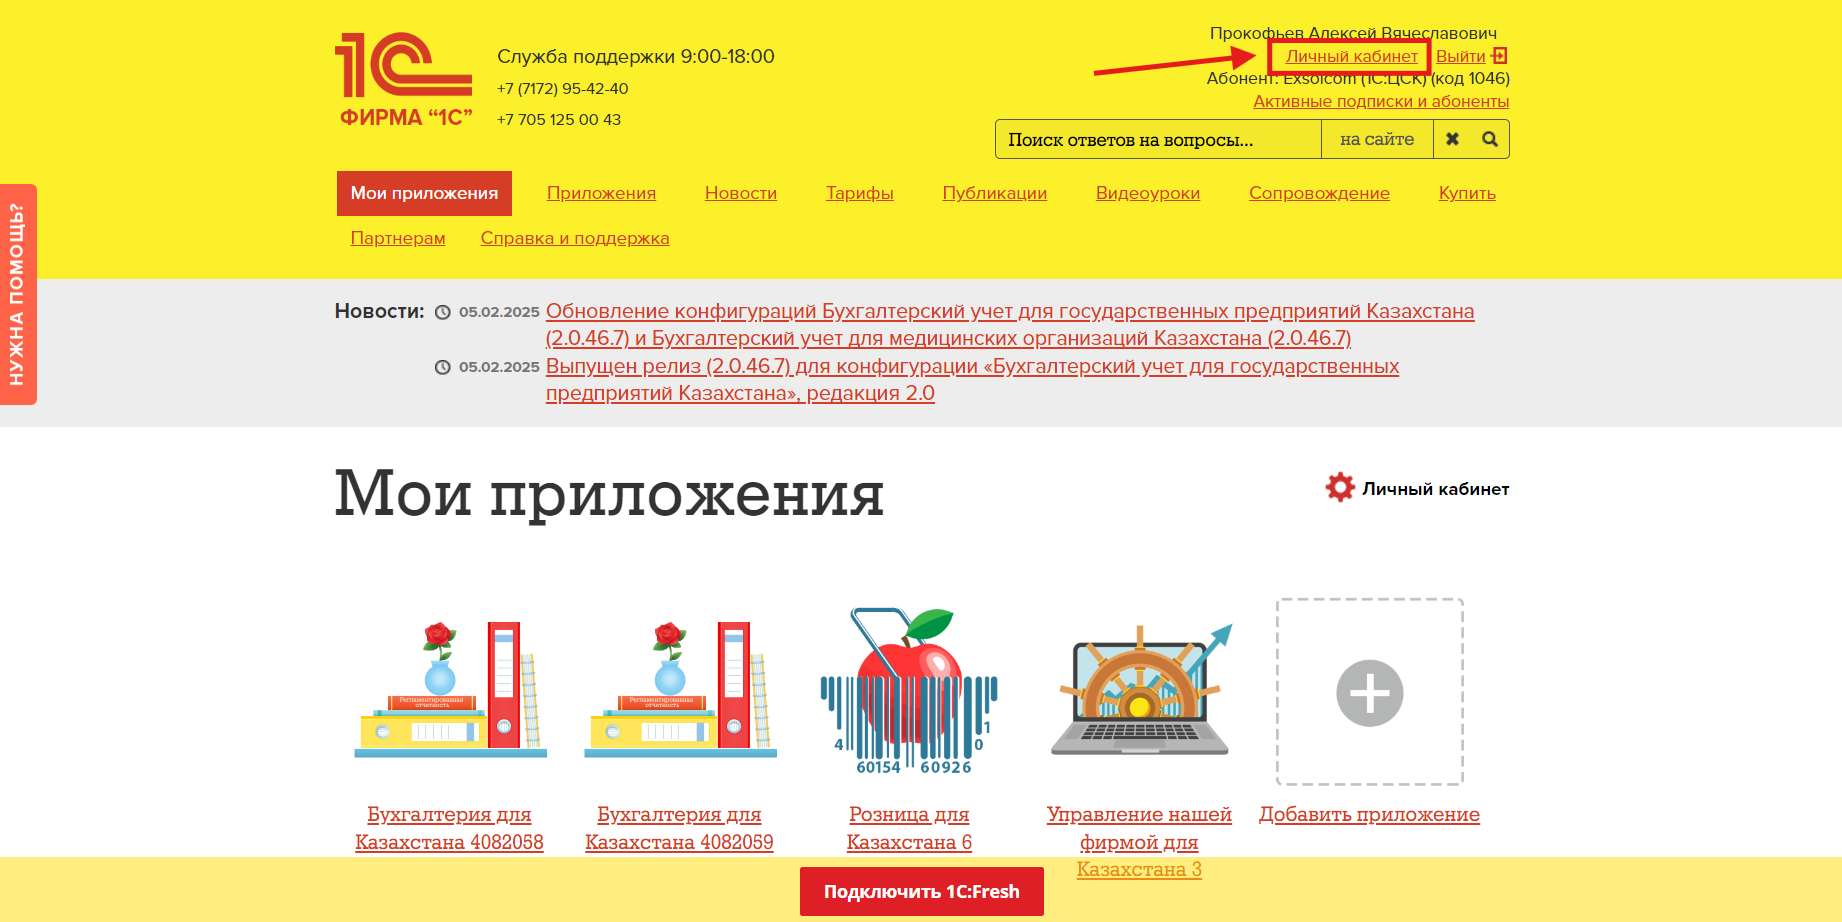
1. First, log in to your 1C Fresh account and click the “Personal Account” button. You will then be redirected to the “Service Manager”.
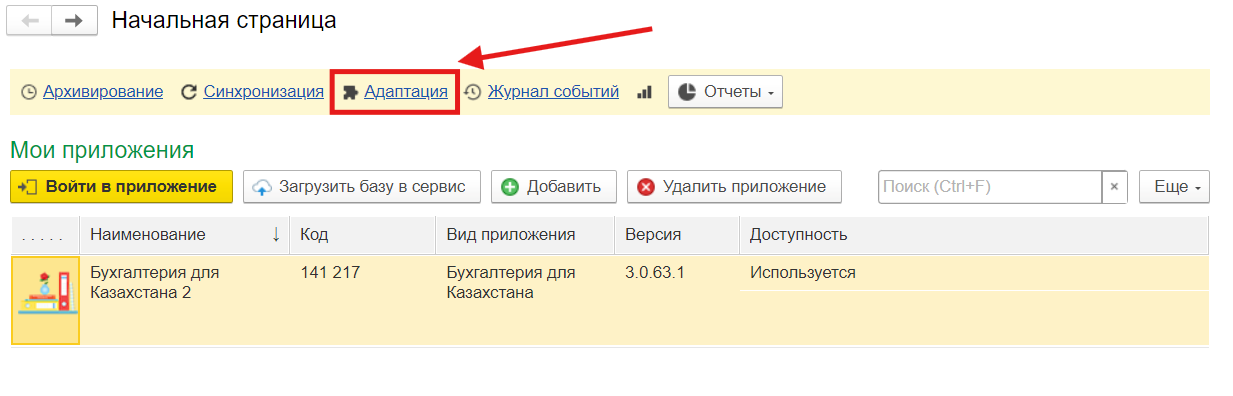
2. In the “Service Manager”, click the “Adaptation” button. A list of available extensions for download will open.
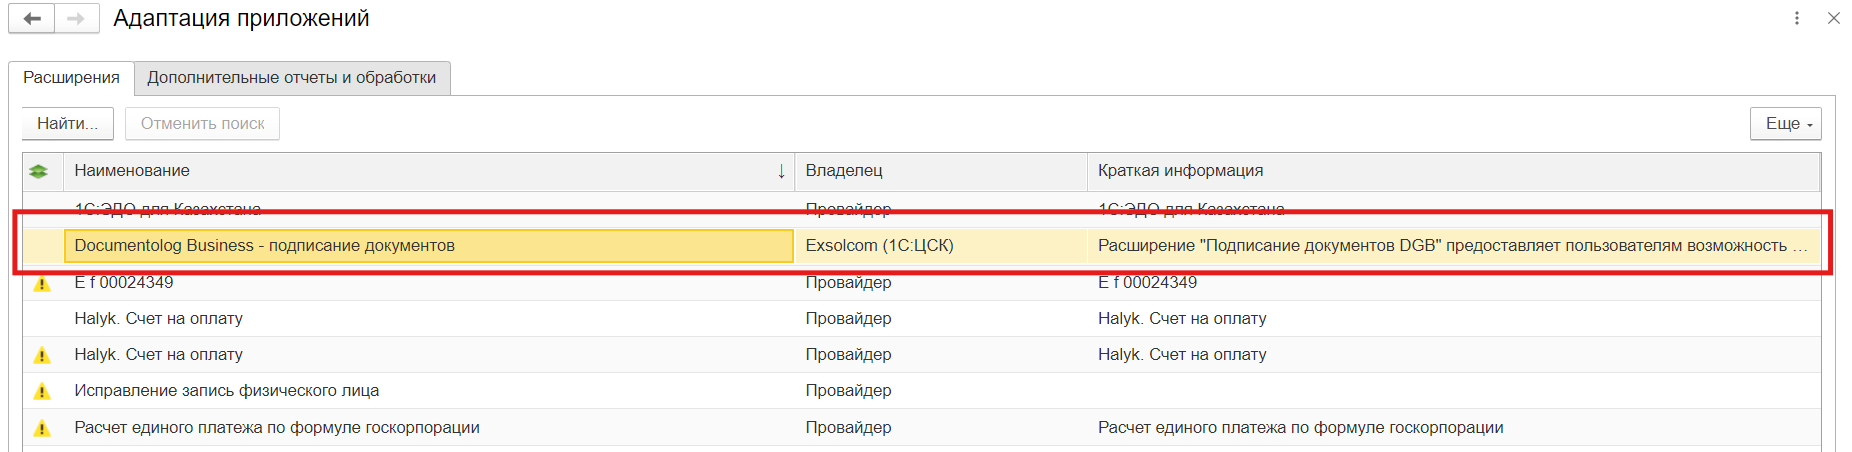
3. A list of available extensions will be displayed. Find the 'Documentolog Business – Sending and Signing Documents' extension and double-click it.
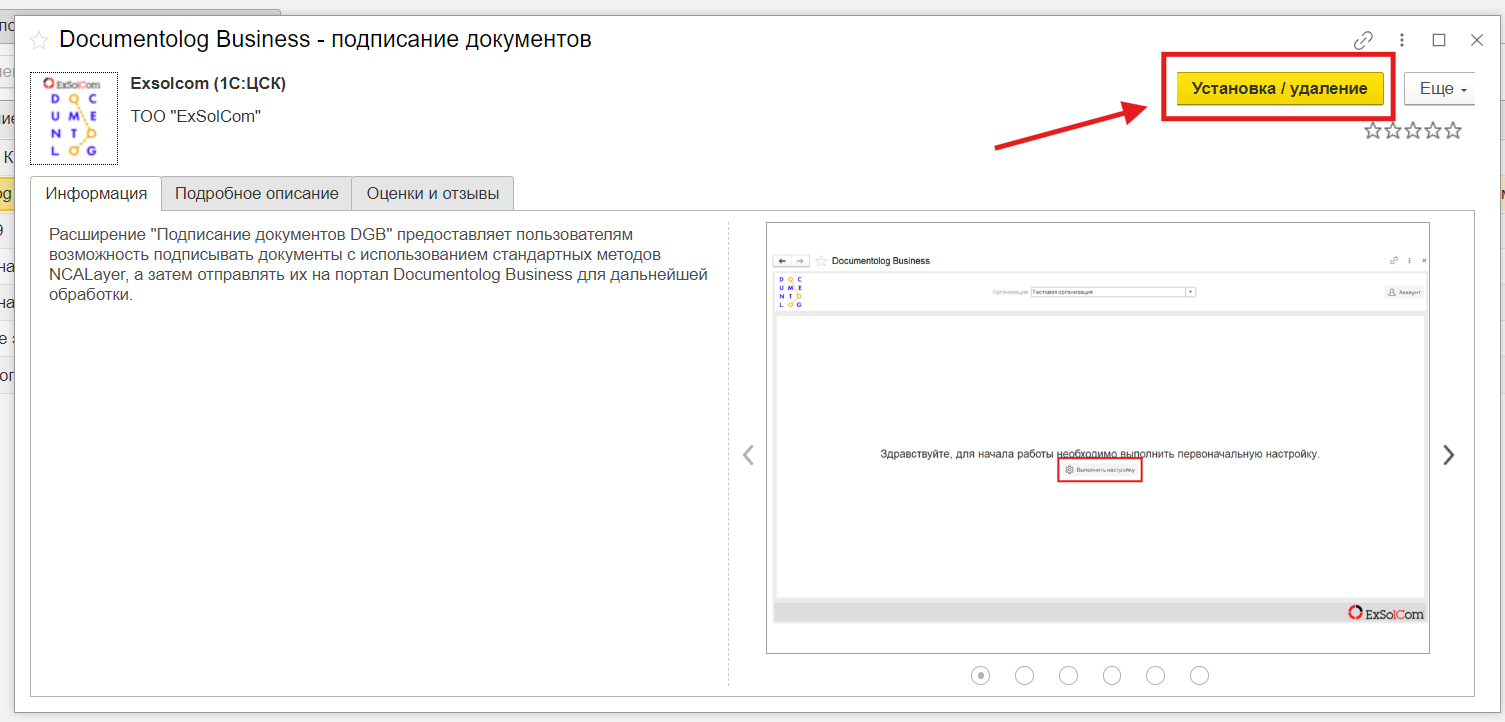
4. Click the “Install / Uninstall” button.
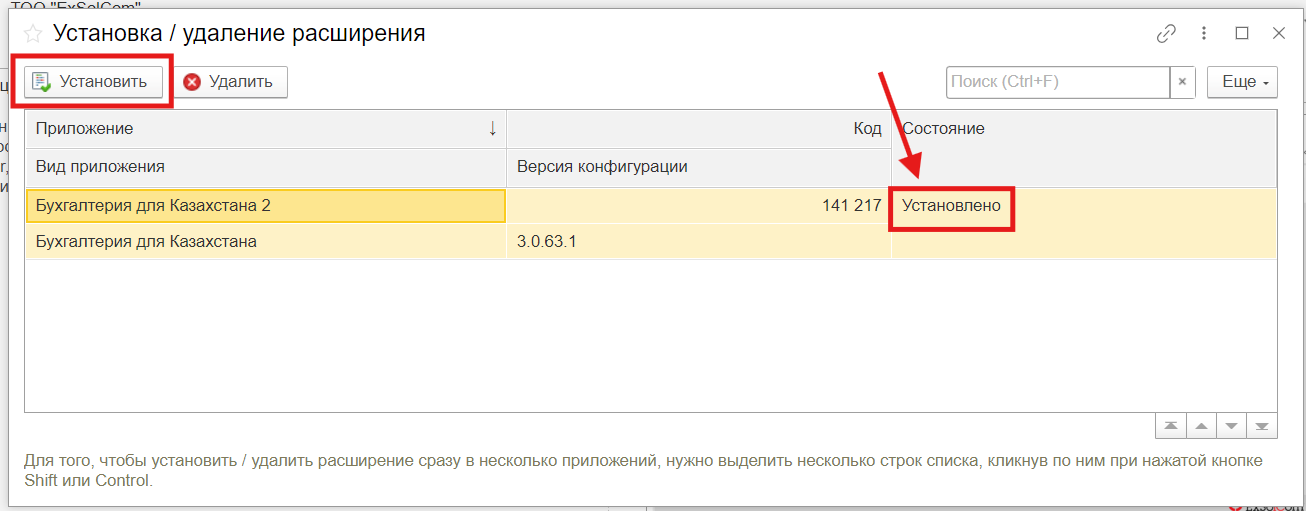
5. Select the required database and click the “Install” button. The extension upload process will begin. Wait for the status “Installed”, then enter the database and start working with the extension.
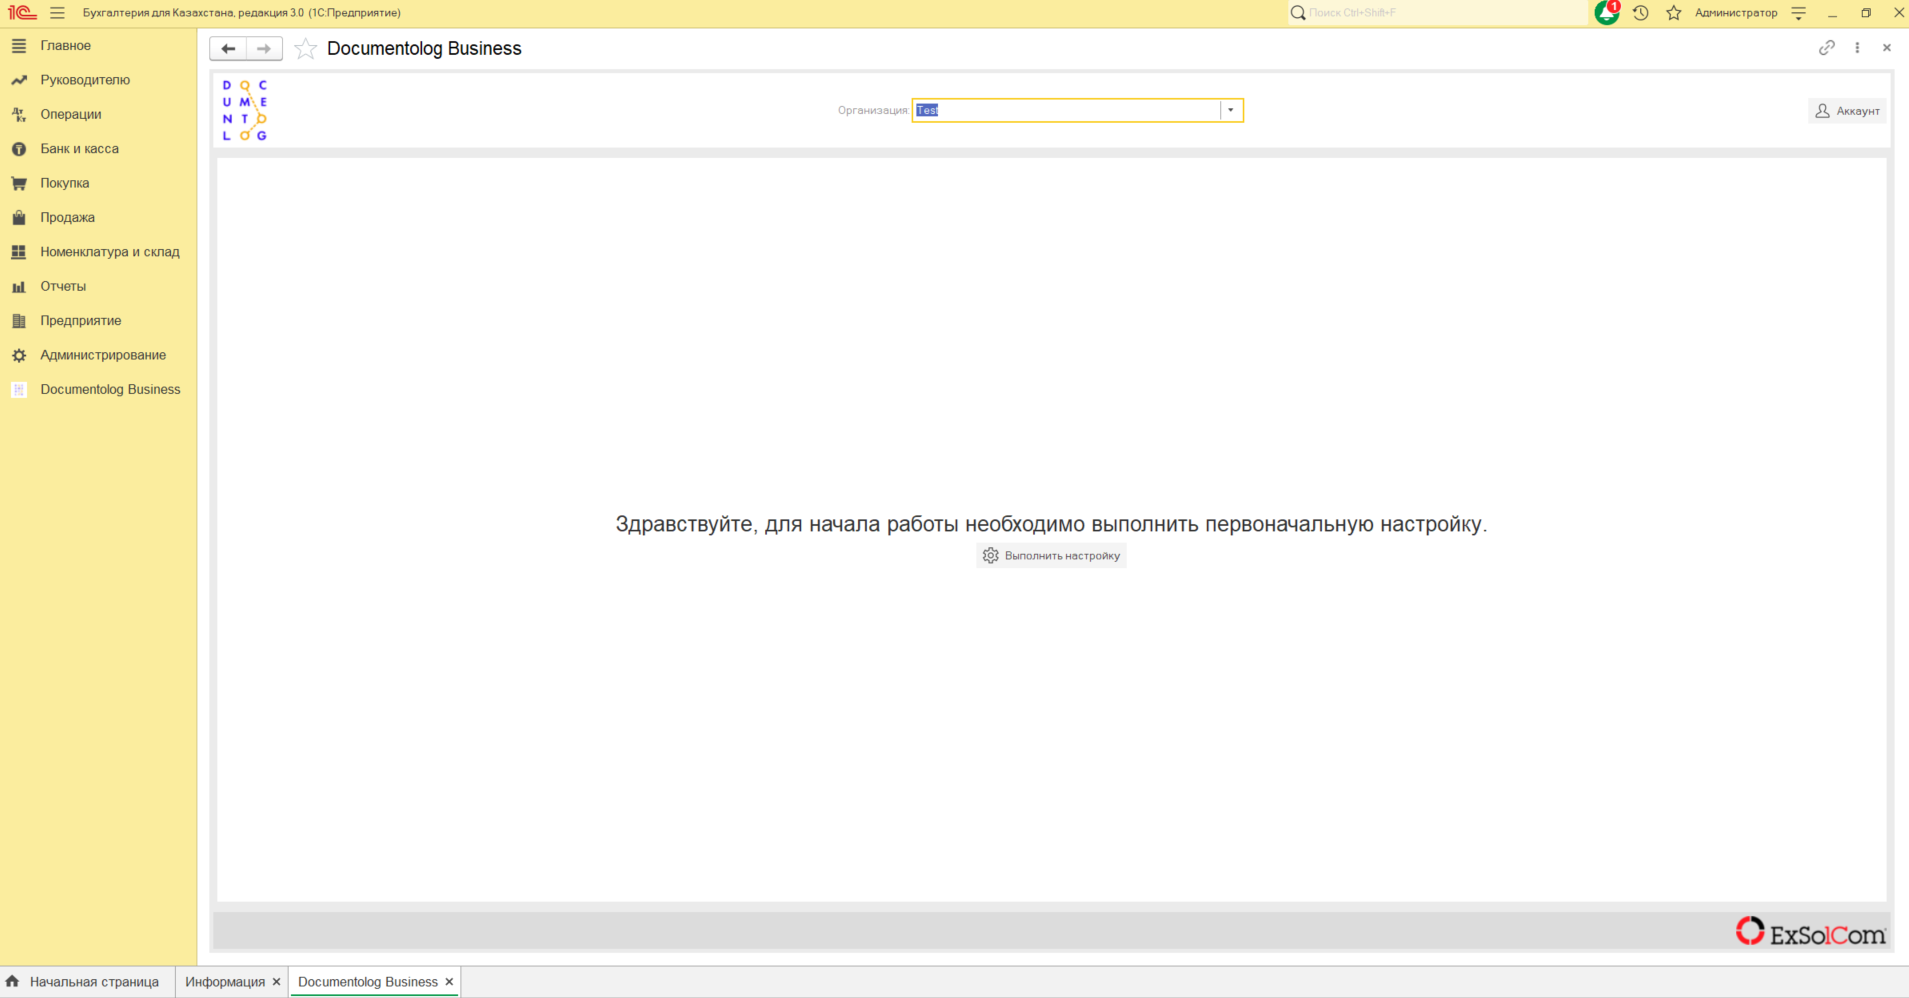
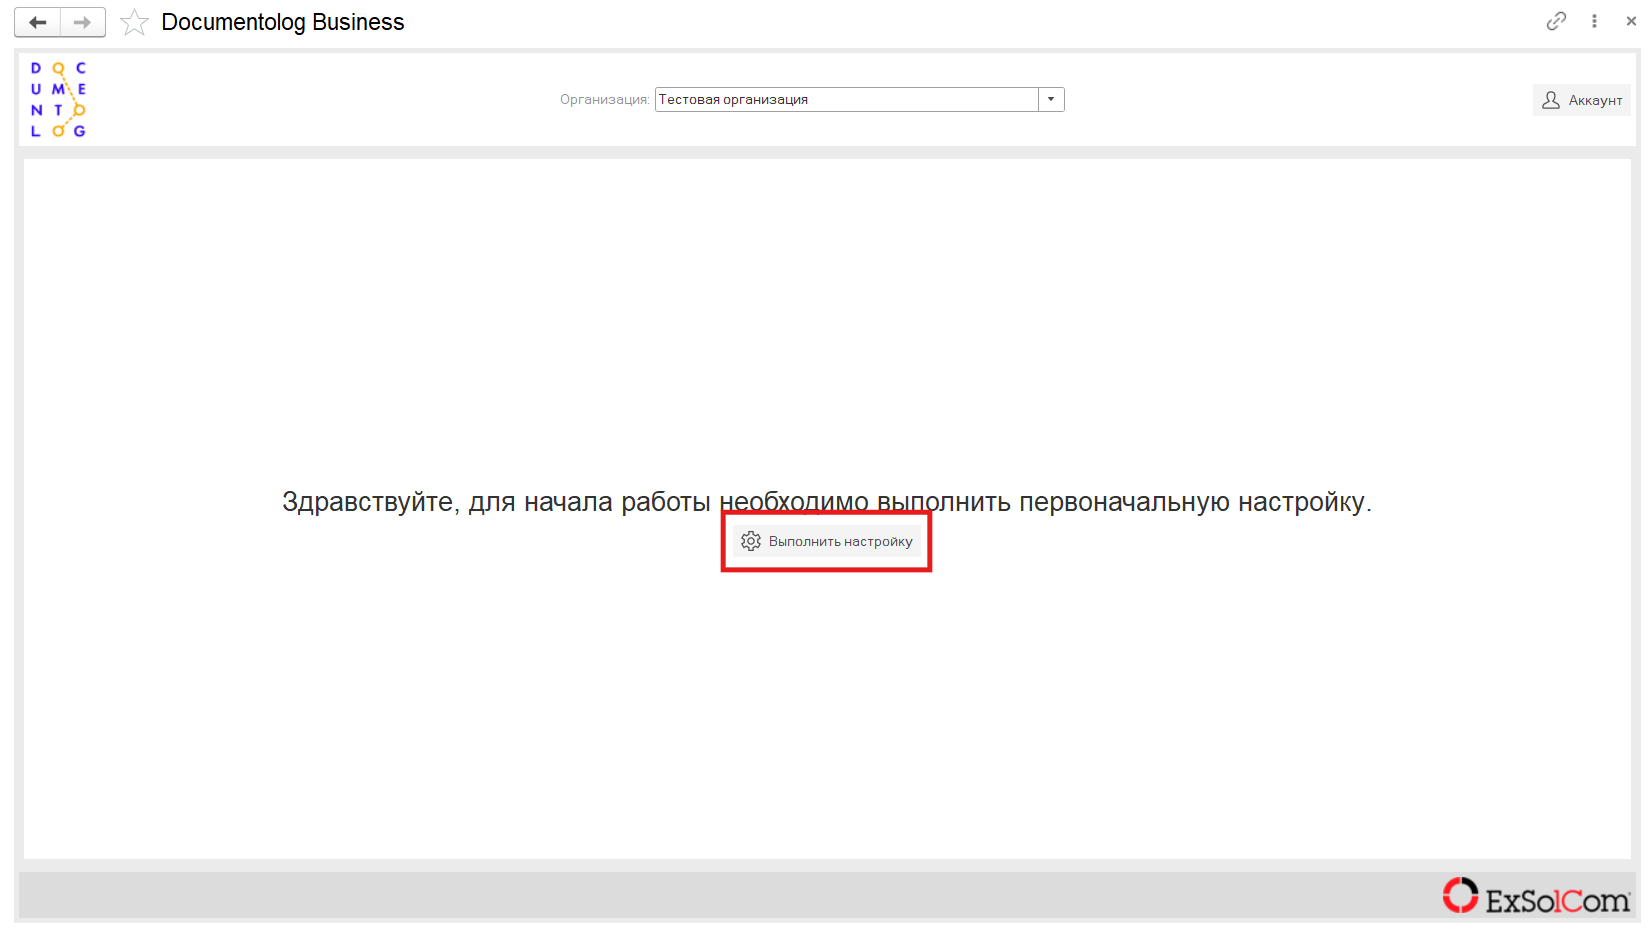
1. When opening the 'Documentolog Business' processing, an initial setup window appears. Click the 'Perform Setup' button.
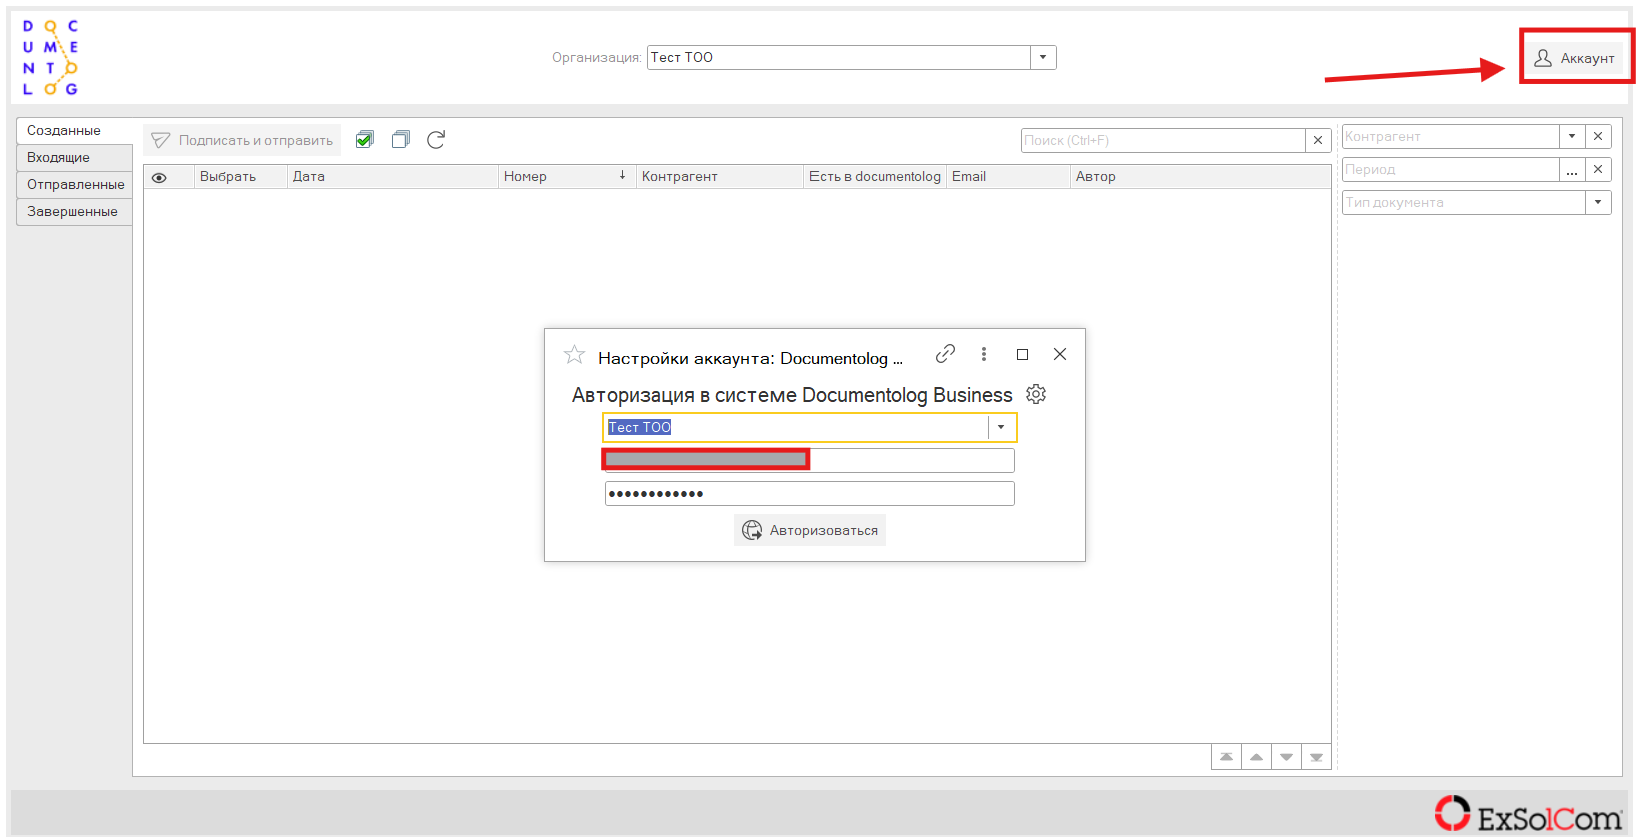
2. An account setup window for Documentolog Business opens.
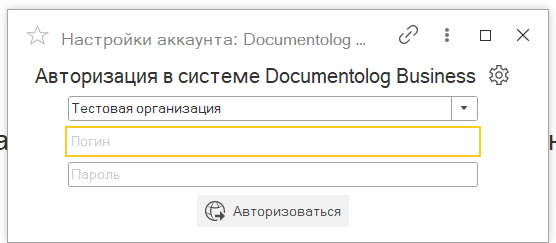
2.1. The main user organization is initially filled in, but it can be changed if multiple organizations exist in the database.
2.2. Enter your login and password to authorize in the “Documentolog Business” system.
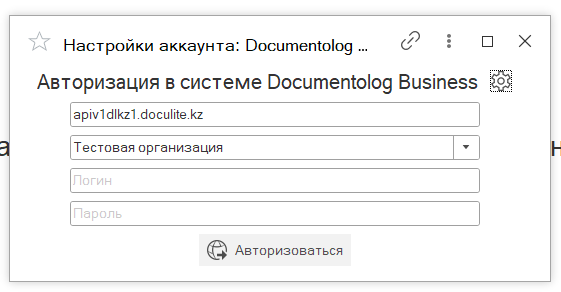
2.3. If you click the gear icon next to the title, the API address used by this extension will open (it is highly discouraged to change the API address, as it affects the entire extension's functionality).
3. After successful authorization, the extension is unlocked.
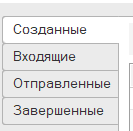
3.1. The left panel contains tabs needed for interacting with the extension. Let's go through each tab in detail.
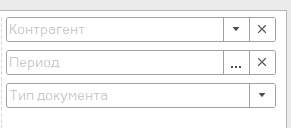
3.2. The right panel contains parameters for retrieving documents with specific filters.
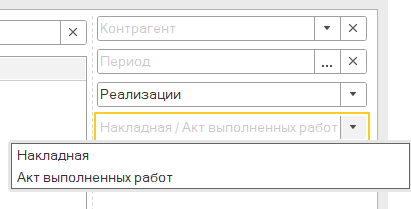
3.2.1. When filling in “Document Type”, selecting “Sales” will reveal a new tab for filtering “Invoices / Work Completion Certificates”. This allows filtering these documents separately.
3.3. The “Created” tab.
This tab displays documents already created in the 1C database.
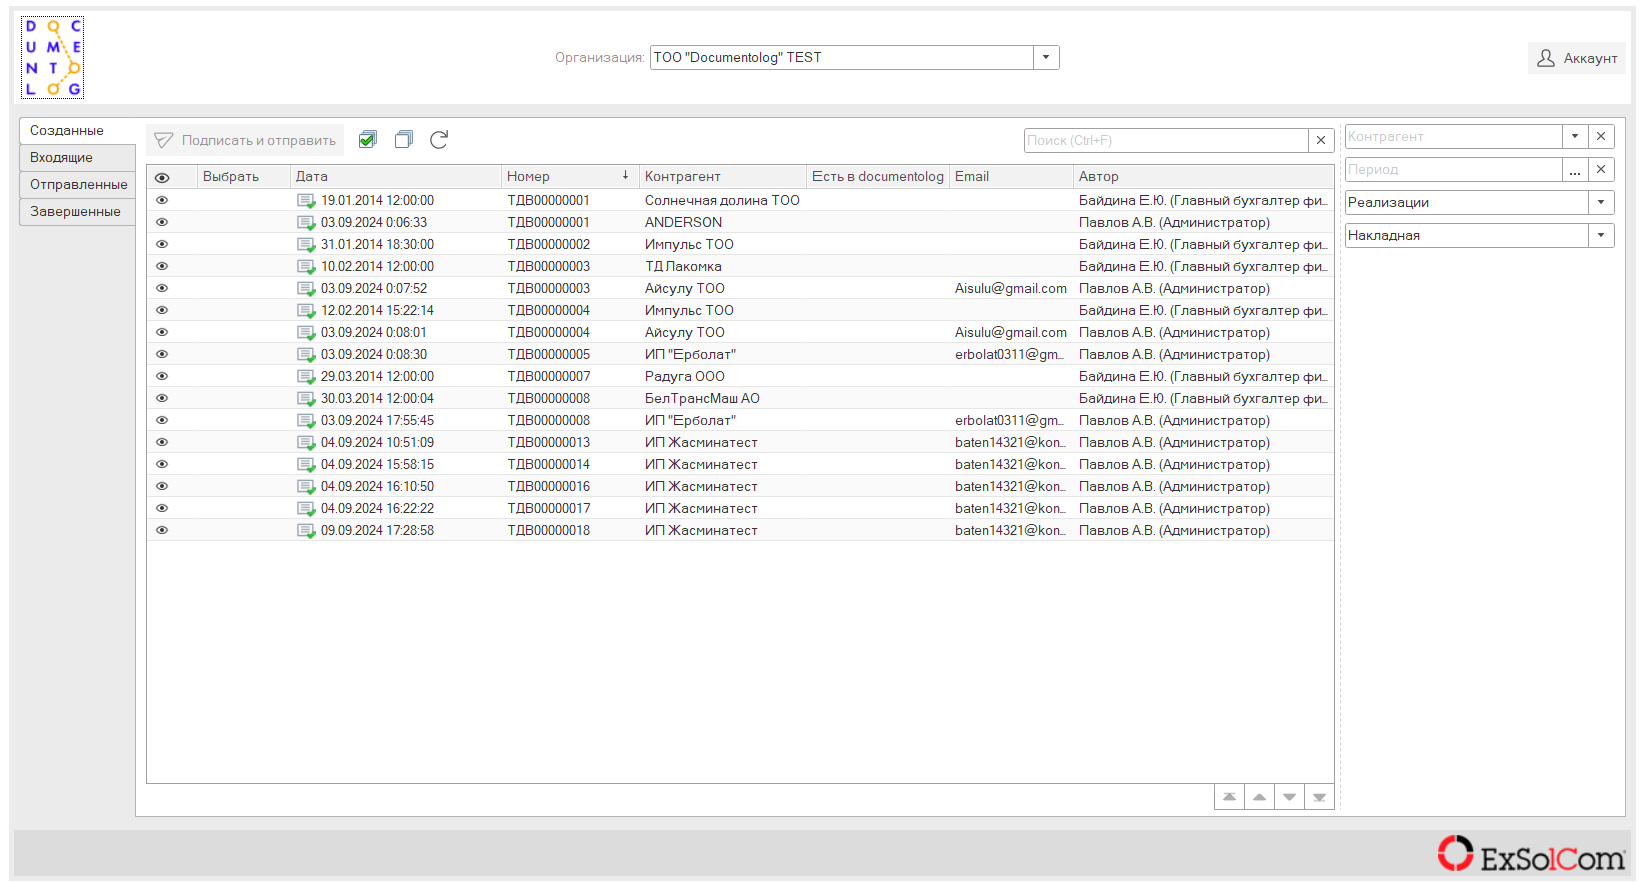
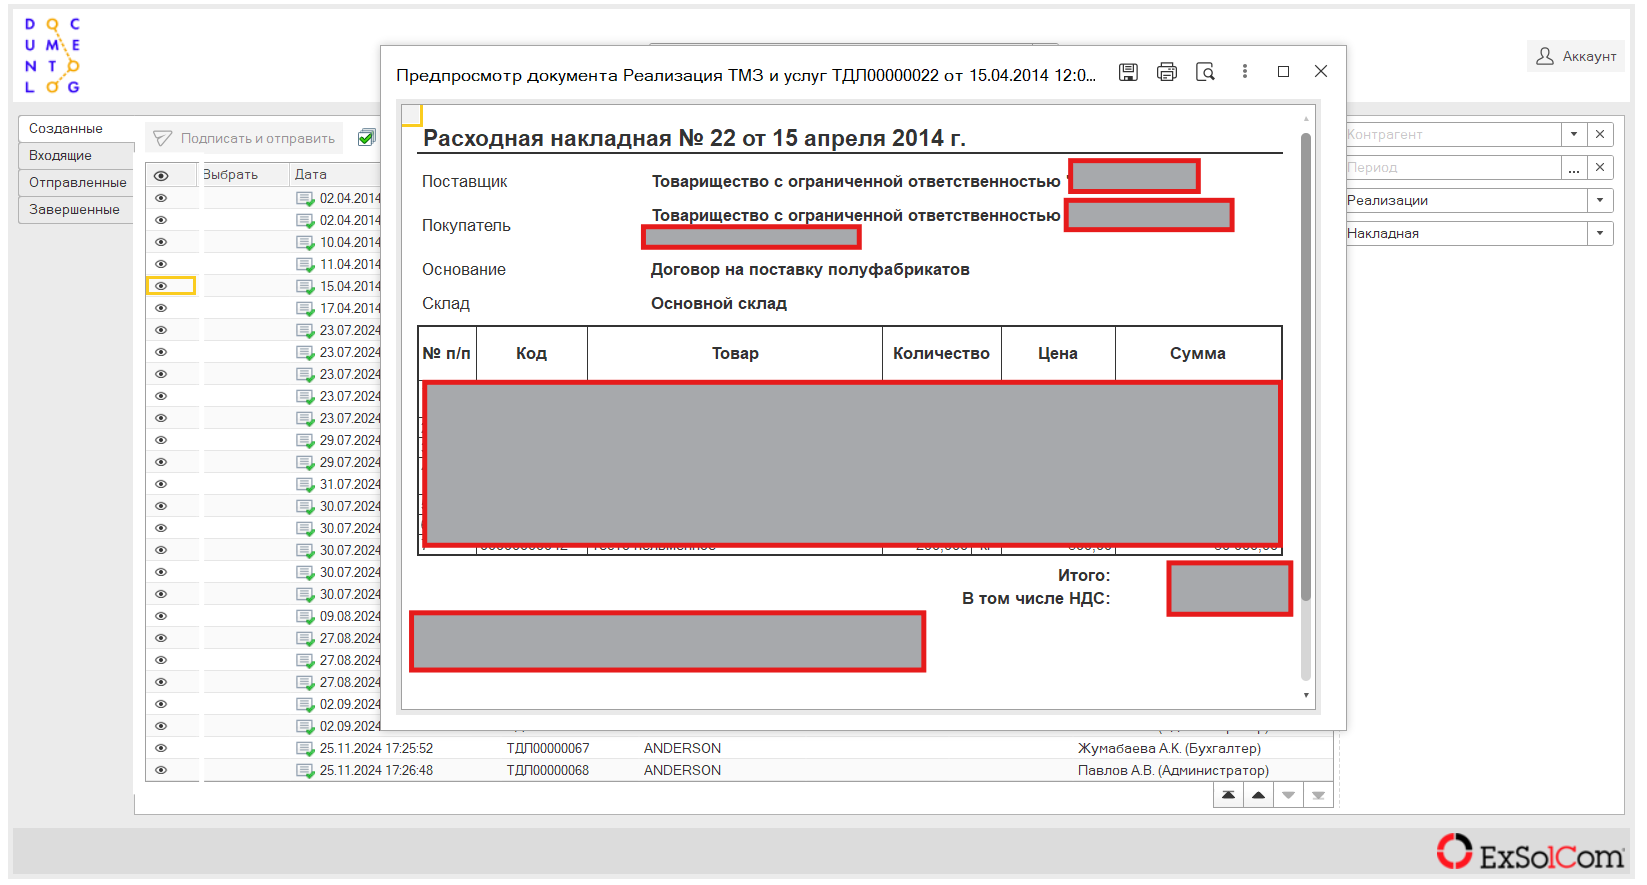
3.3.1. Double-clicking the eye icon on a specific document opens its layout.
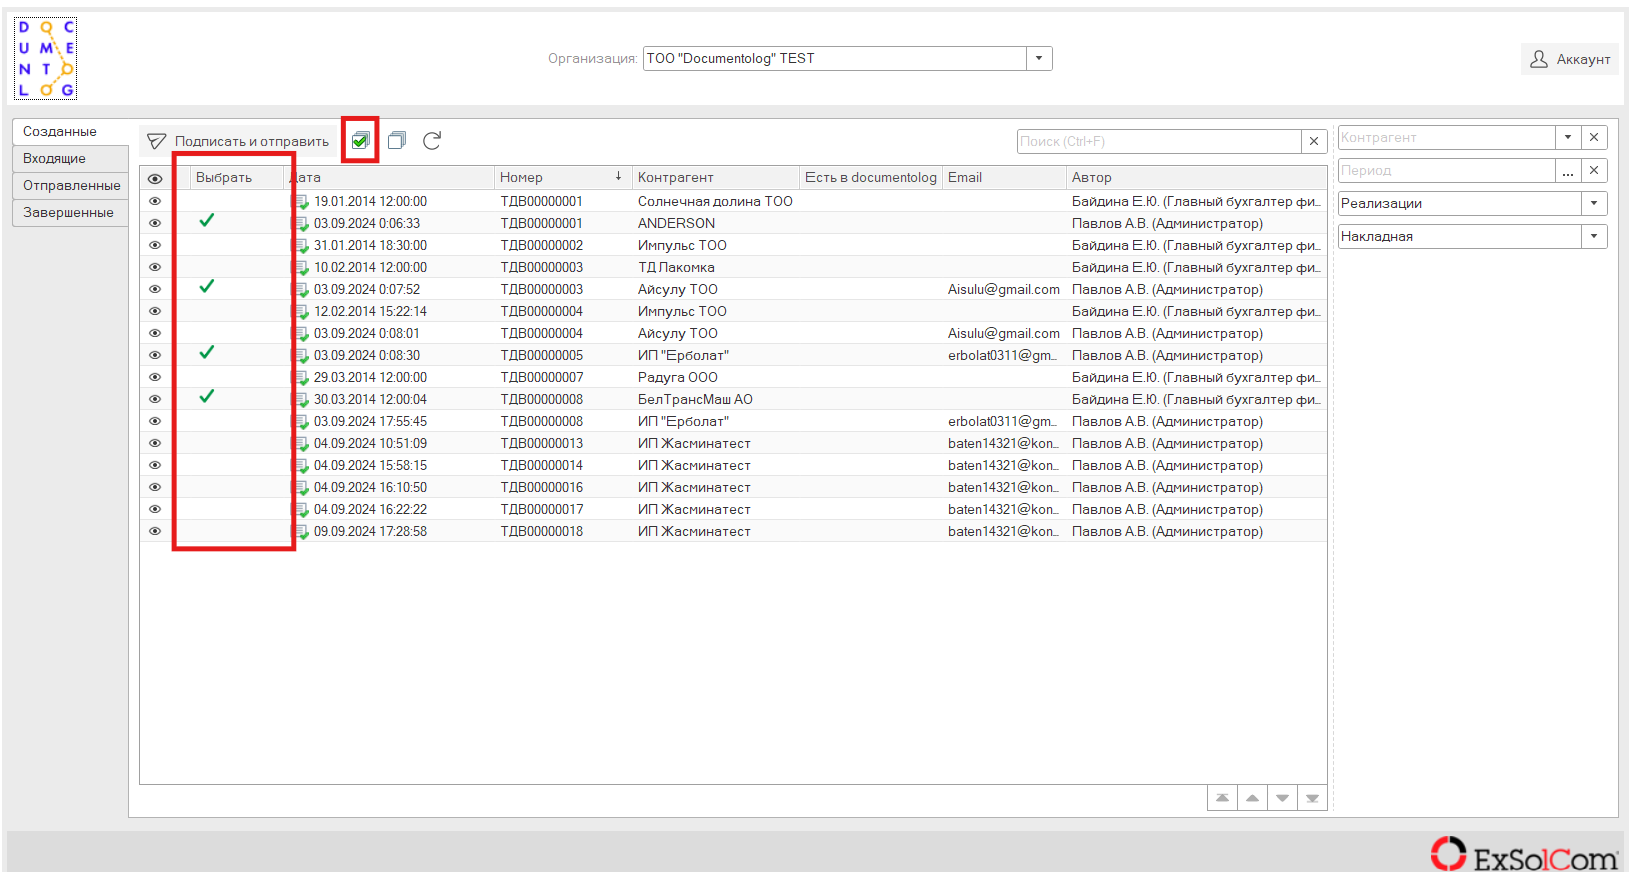
3.3.2. To select documents for signing, you can use the “Select All” button or check the “Select” box for specific documents.
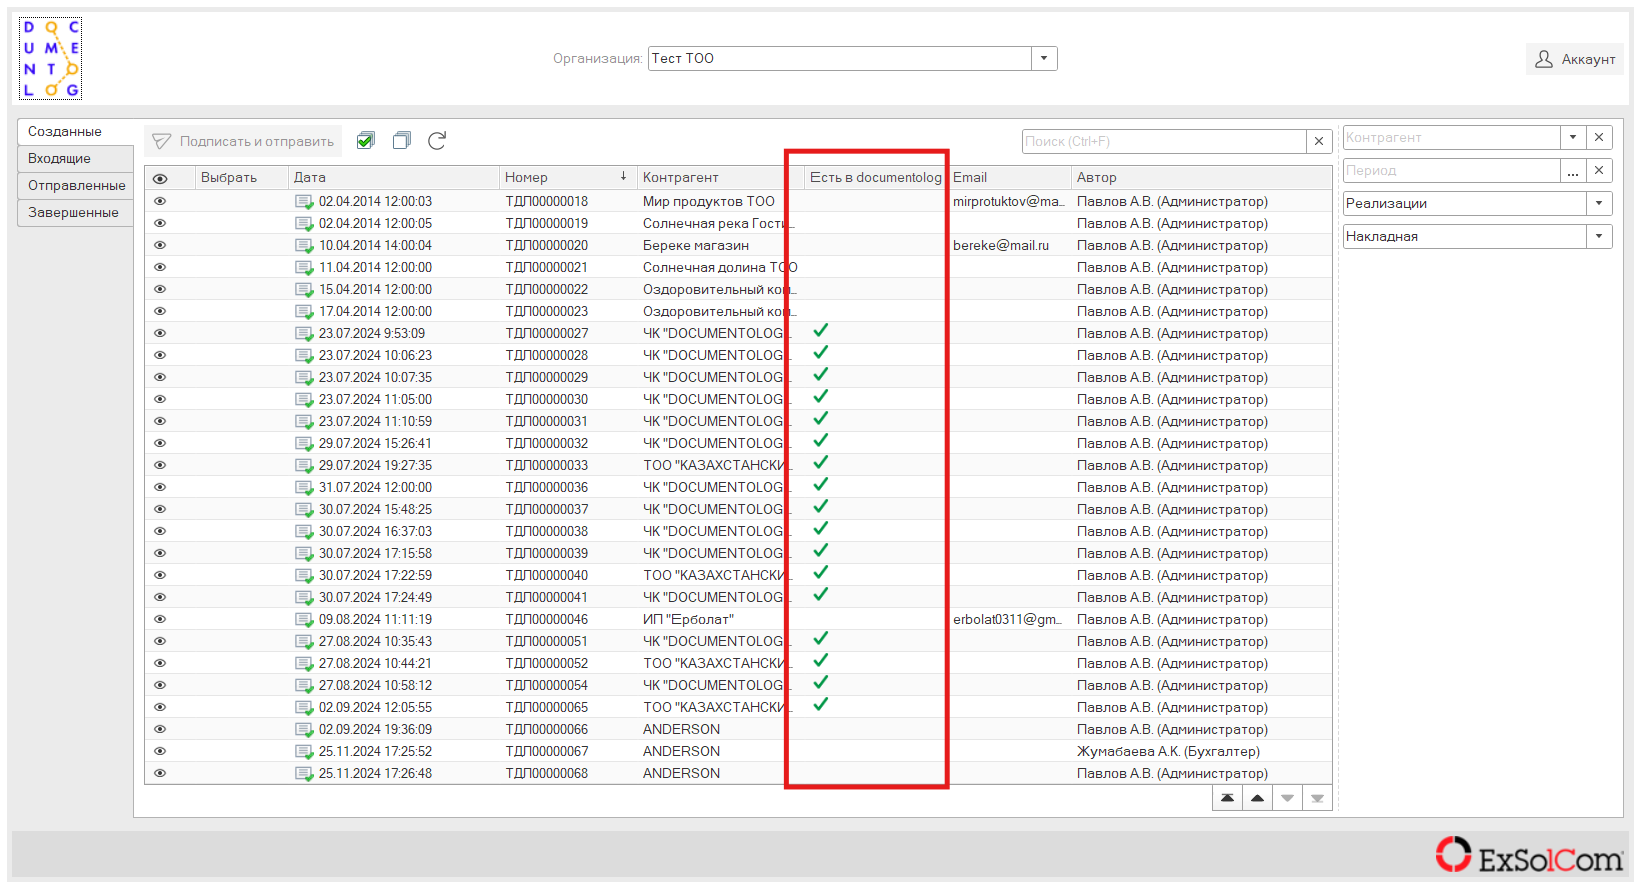
3.3.3. The field “Exists in Documentolog” shows whether the selected document's counterparty exists in the Documentolog system.
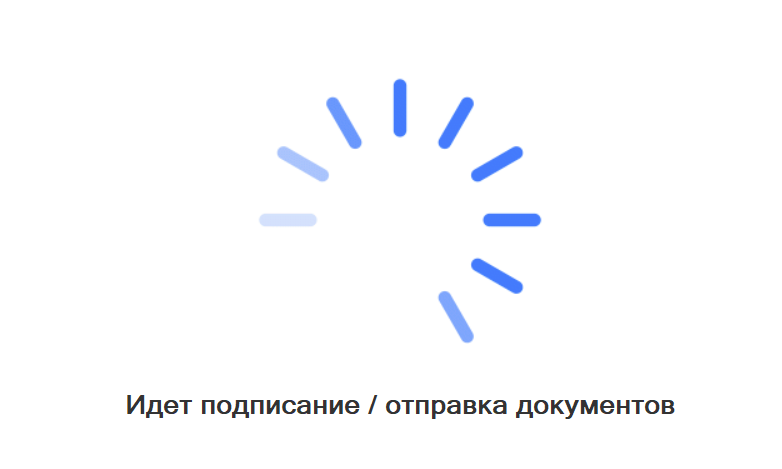
3.3.4. After selecting documents, the 'Sign and Send' button is enabled. This button calls the NCALayer window for document signing. Once signed, documents are sent in the background to the Documentolog Business system.
During signing, you can continue using the database.
You cannot close the processing while signing is in progress, and it is highly discouraged to close the database during sending.
3.3.5. After sending, notifications will appear showing the number of documents sent or any failed attempts.
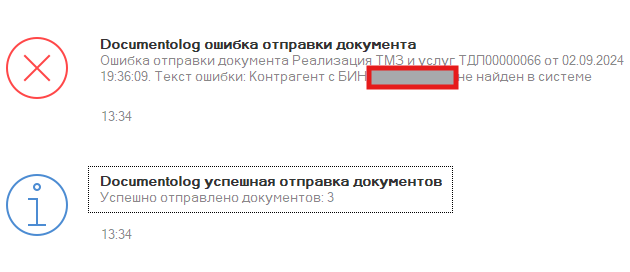
3.4. Tabs “Incoming”, “Sent”, “Completed”.
These tabs display document lists from the Documentolog Business system. To retrieve documents, fill in the parameter on the right and click 'Retrieve Documents'.
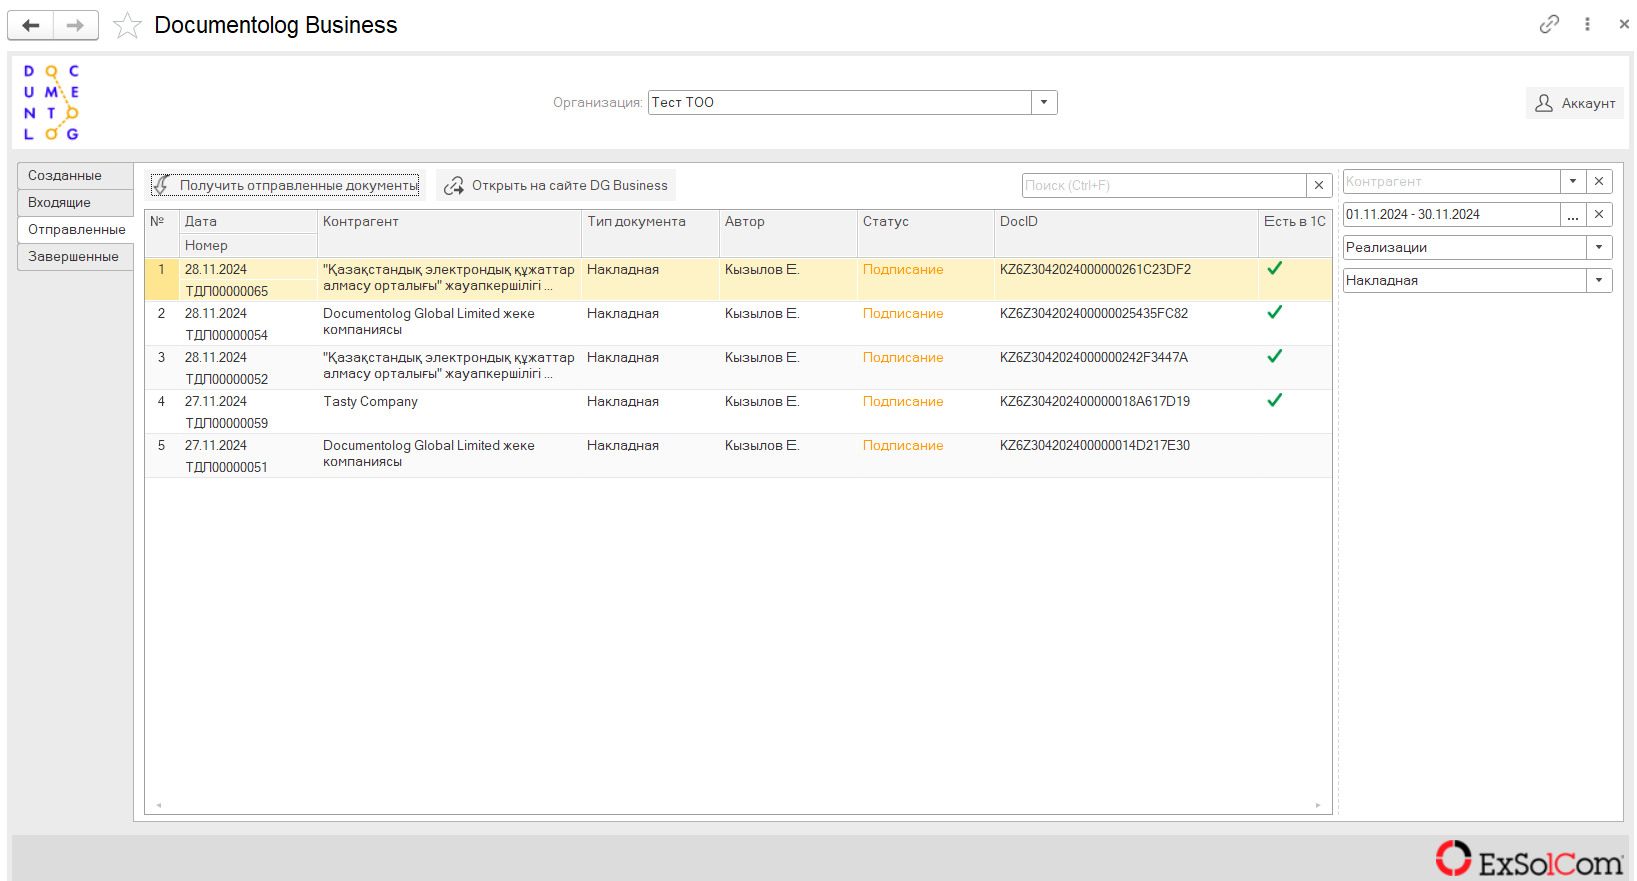
3.4.1. The field “Exists in 1C” indicates whether a document is registered in the database. Double-clicking a document with a checkmark opens it in a new tab.

3.4.2. The “Open in Documentolog Business” button opens the document on the Documentolog Business portal.
3.5. Account button in the upper right corner of the extension.
This button opens the Documentolog Business account settings.
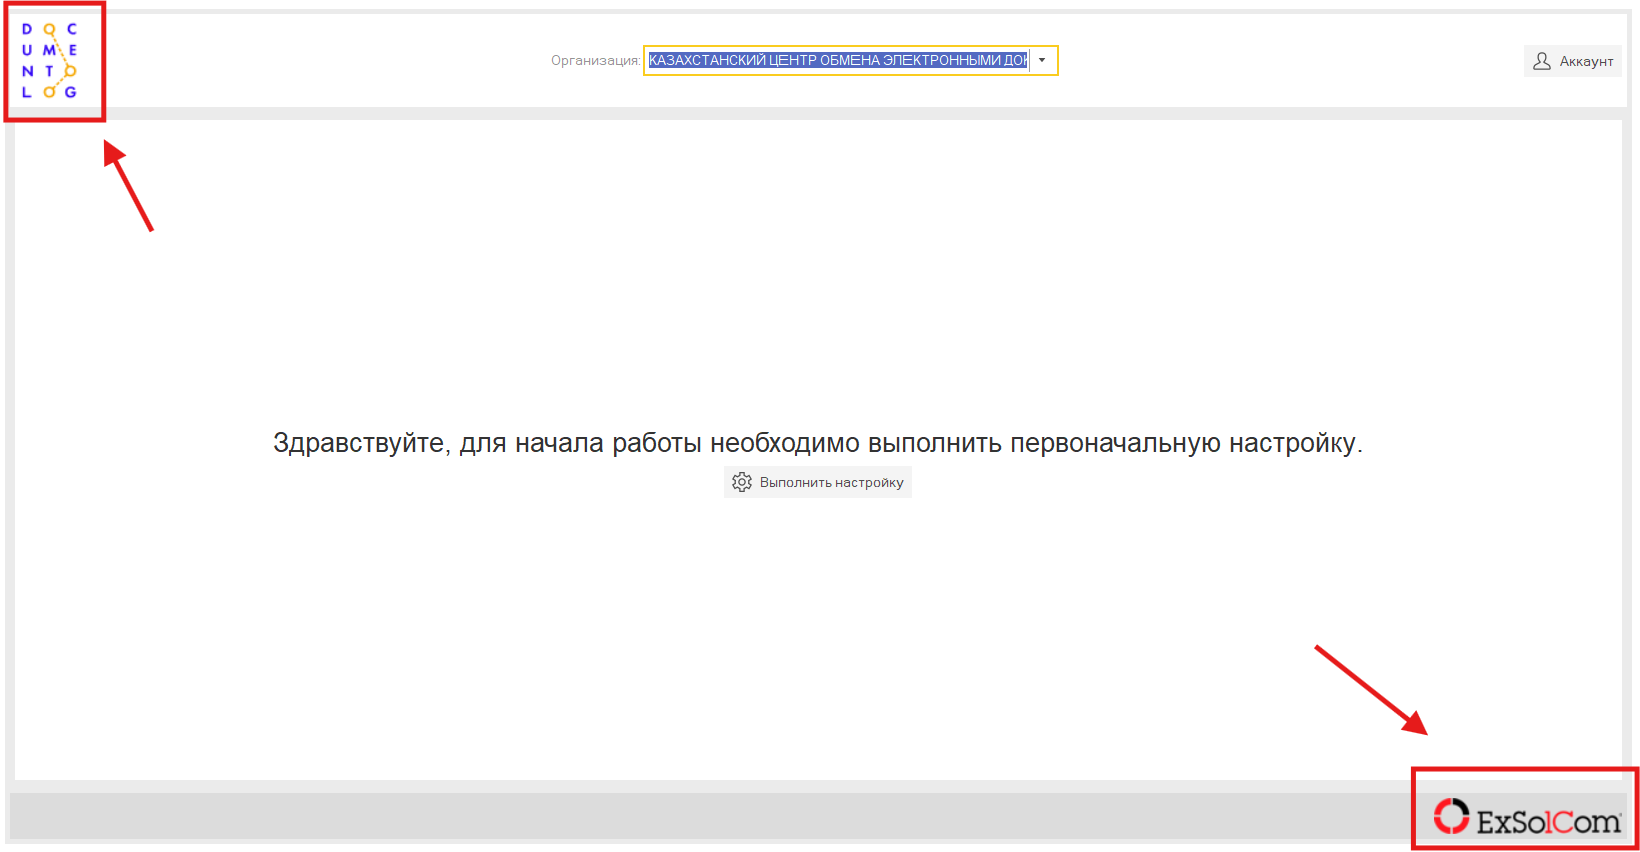
3.6. Company logos.
Clicking on the “Documentolog” or “ExSolCom” company logos will open the official company website in your browser.
4. Sending Documents from 'Sales of Goods and Services' and 'Reconciliation Acts'. Documents can be sent from both the list form and the document form.
4.1. A button “Send via Documentolog” has been added to these forms. Clicking this button opens the document layout with a 'Sign and Send' button.
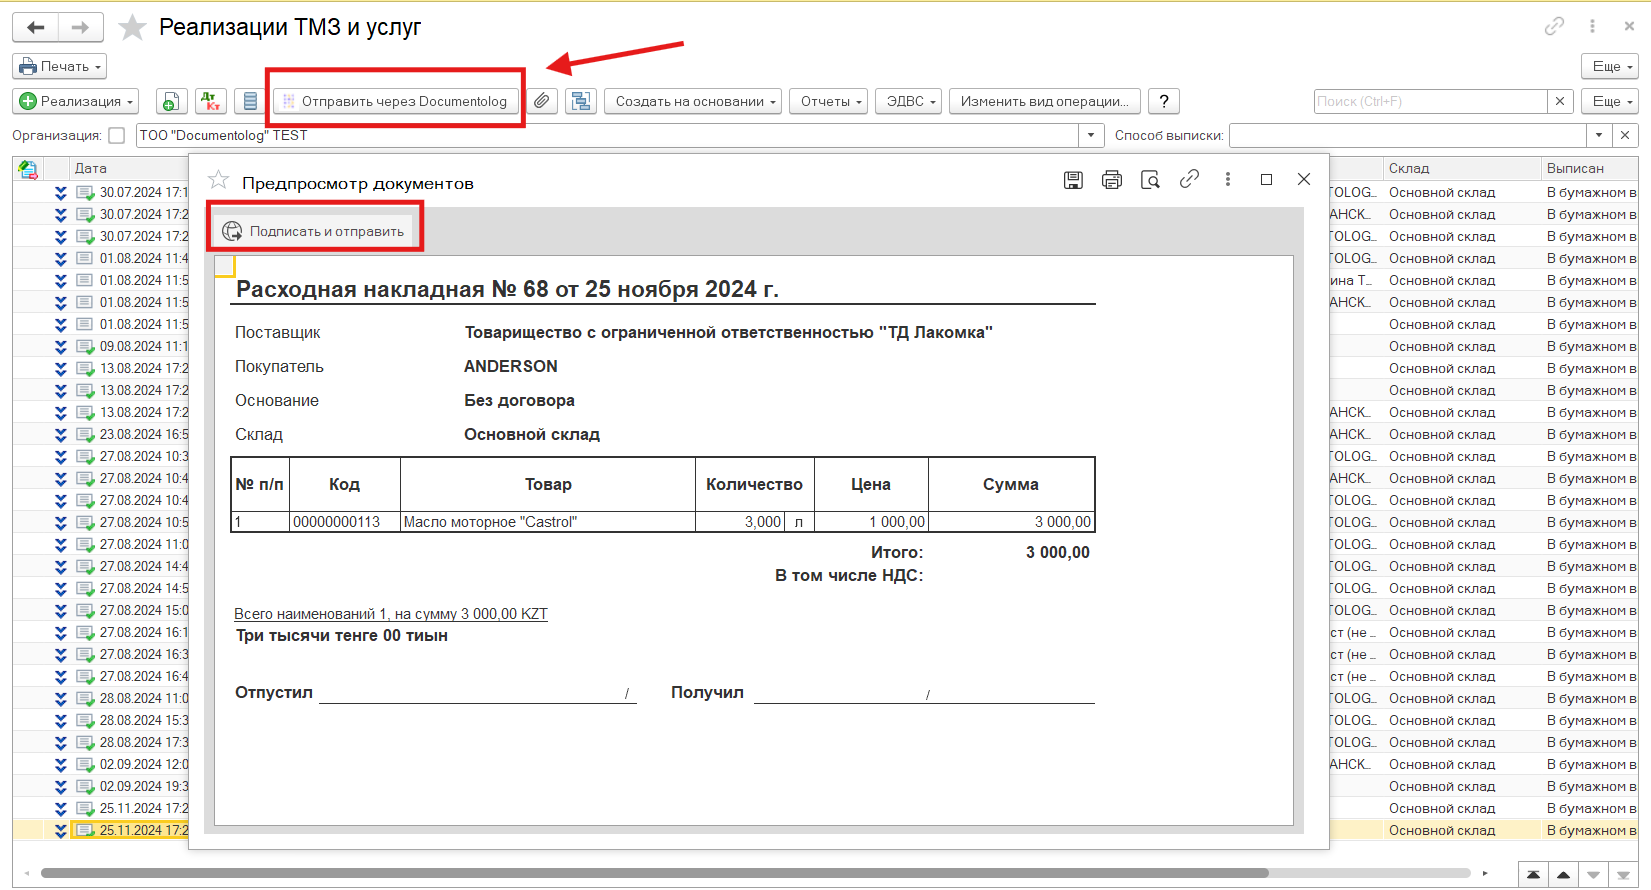
4.2. If the document has already been sent, the button will be disabled, and a message “The document has been signed and sent” will appear.

5. Receiving and Signing Documents from the Documentolog Business System.
5.1. To start receiving documents, go to the “Incoming” tab, fill in the parameters on the right to retrieve specific types of documents, and then click “Get Incoming Documents”.
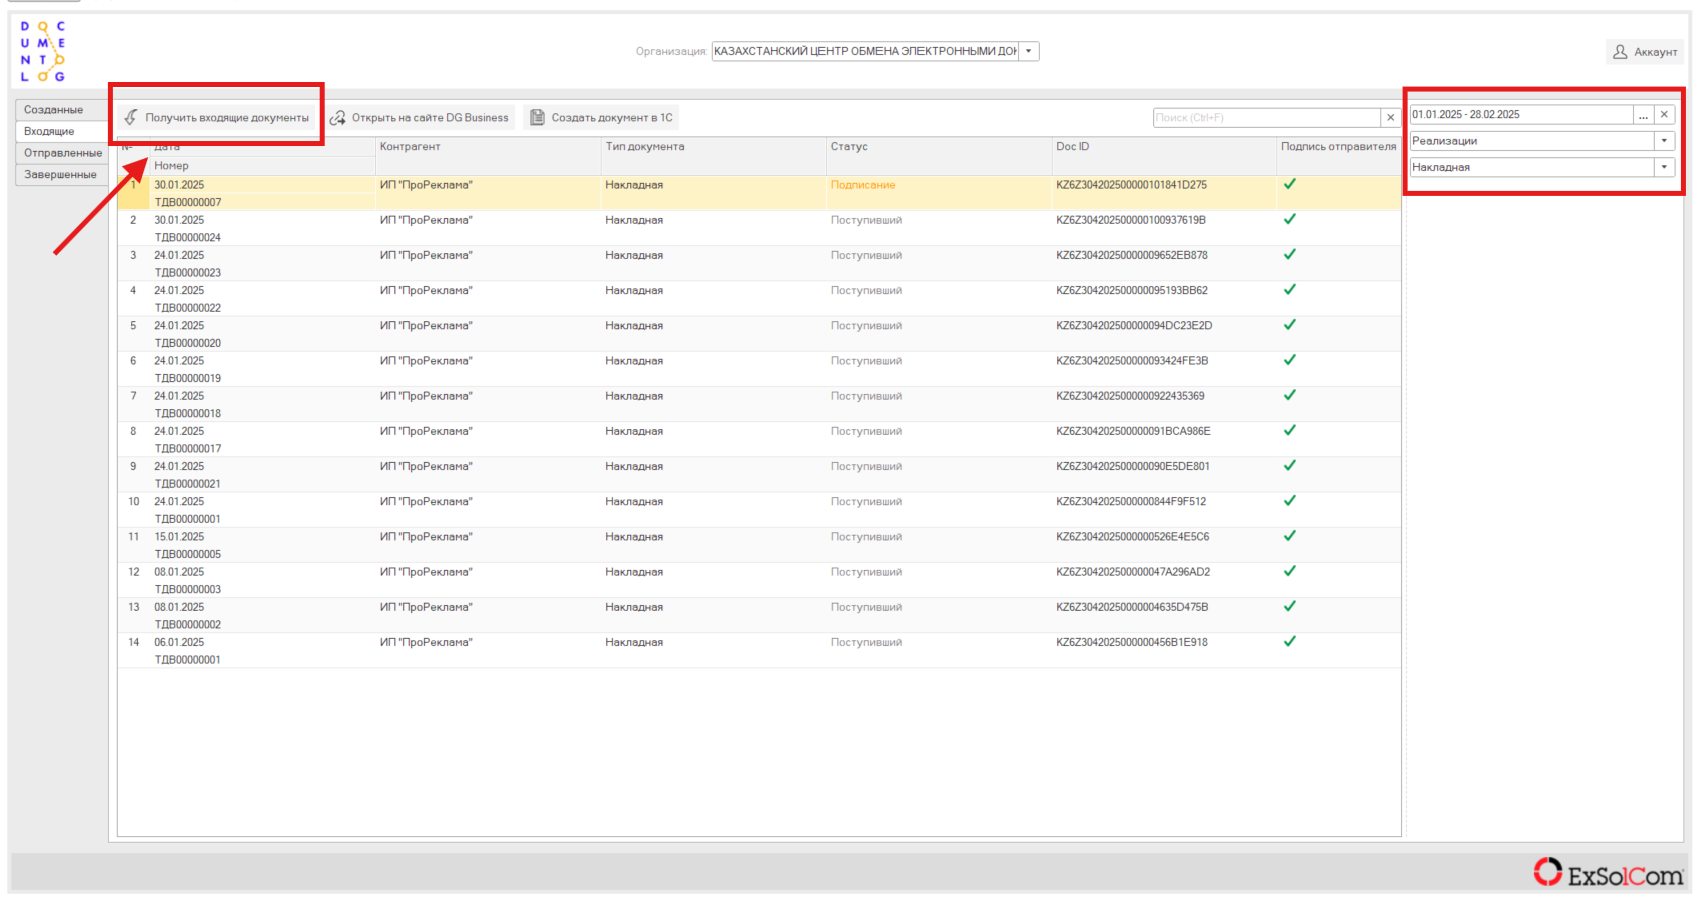
5.2. To create a document in 1C, click the “Create Document in 1C” button. If “Sales - Invoice” documents are received, they will be created as “Receipts” in the system. The same process applies to work completion certificates.
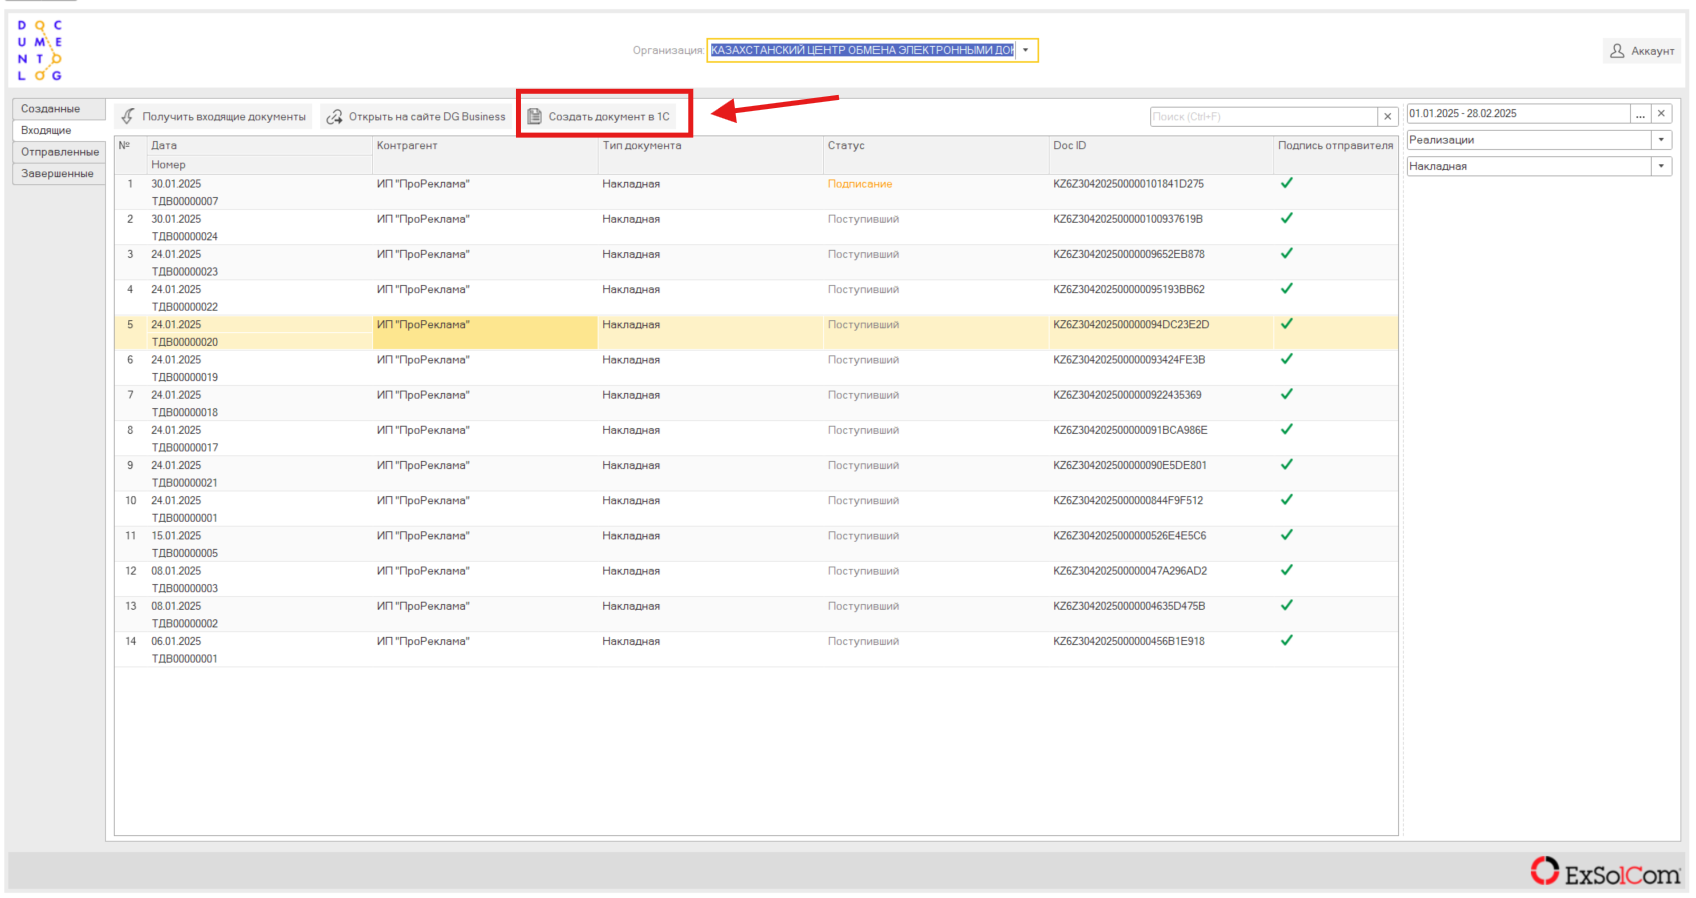
5.2.1. To create “Reconciliation Acts”, the database must contain the same number of documents as specified in the received document from Documentolog Business.
For example, if the document from the portal specifies 3 “Sales of Goods and Services” documents, then our database must contain 3 corresponding “Receipts of Goods and Services” documents. Additionally, the dates of these documents must fall within the period specified in the reconciliation act from the portal.
5.3. Clicking the “Create Document in 1C” button initiates the document creation process and opens the NCALayer window for signing the document with a second signature.
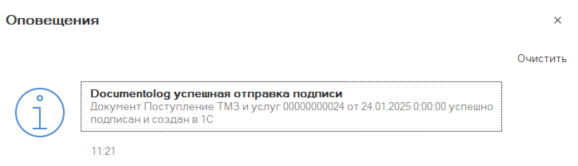
5.4. After successful creation and signing, a pop-up notification appears, indicating which document was created in the database. This completes the document workflow, with the document being signed by both parties and available to the sender, recipient, and on the Documentolog Business portal.
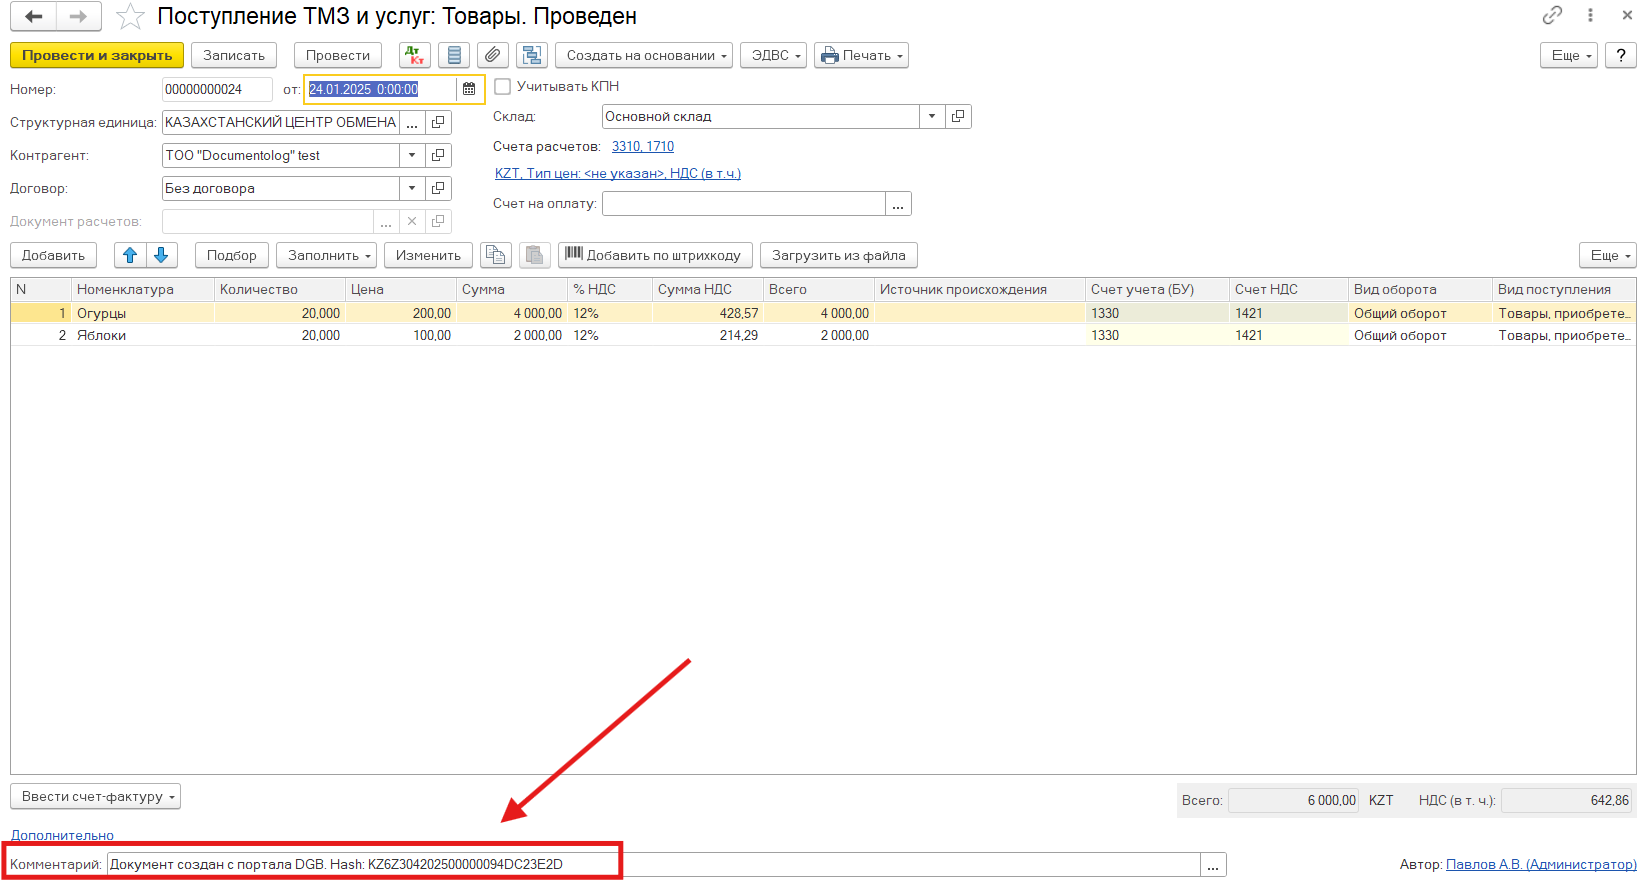
5.5. Documents created in Documentolog Business have the “Comment” field filled in, stating that the document was indeed created in Documentolog Business. Additionally, the document stores its ID (Hash), matching the identifier on the portal.
6. Convenient Creation of Counterparties in the Database.
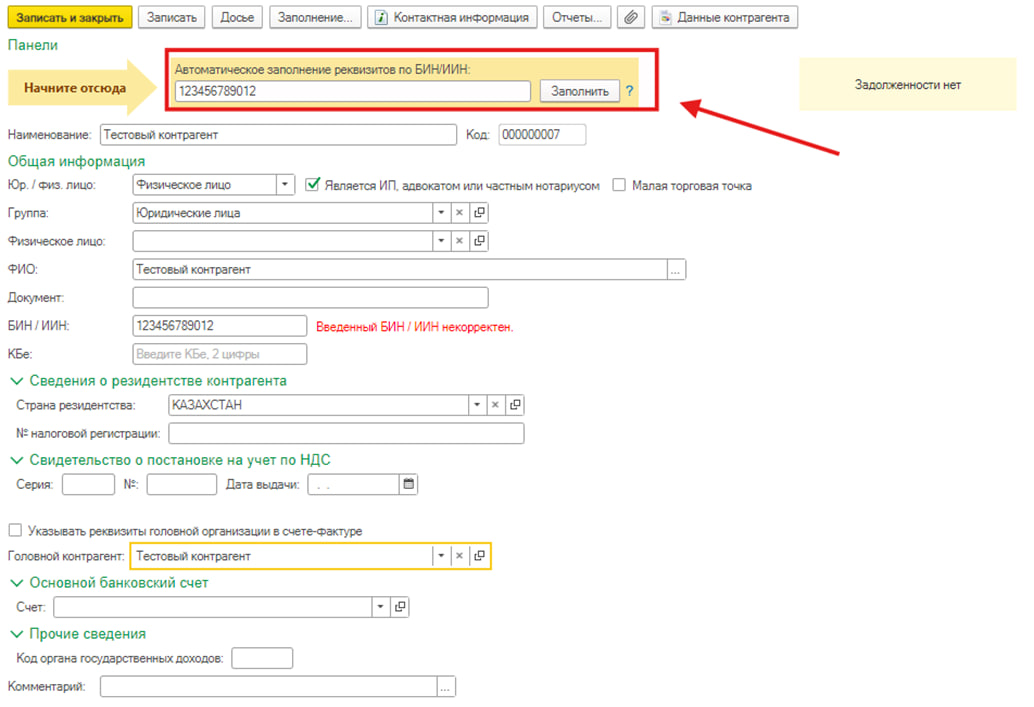
6.1. For user convenience, counterparties can be created using the 1C “Counterparty” mechanism. To do this, start creating a new counterparty in the “Counterparties” directory.
6.2. Enter the BIN/IIN of the counterparty in the provided “Automatic filling of details by BIN/IIN” mechanism and then click “Fill”.
The mechanism will automatically fill in all possible details (hidden by gray squares in the screenshot) as well as the counterparty’s contact information.
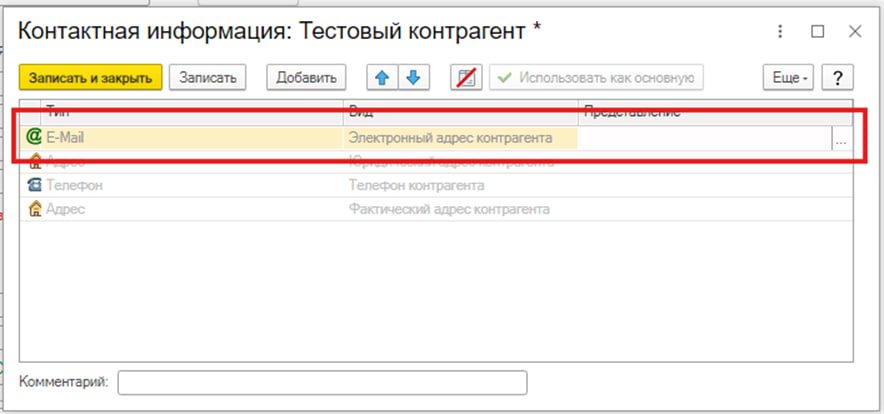
6.3. The email address can also be entered manually. In the counterparty card, click the “Contact Information” button. You will see a field for an email address, which should be filled in the 'Representation' column. It is recommended to enter only one email address.